
Bass pickup for a customer. #funktronicpickups #basspickups #handwoundpickups #boutiquepickups
Instagram filter used: Clarendon
Bass pickup for a customer. #funktronicpickups #basspickups #handwoundpickups #boutiquepickups
Instagram filter used: Clarendon

Just wound up this FAT P90-style single coil, and stuck it in the test bass. This one has got some real booty! #funktronicpickups #basspickups #guitarpickups #handwoundpickups #boutiquepickups
Instagram filter used: Normal
The Funktronic Bass Sidewinder has been deprecated and is no longer in production at this time. It has been replaced by the Funktronic AlNiCo 8 Bass Sidewinder. This post will remain in memoriam.
The Funktronic Bass Sidewinder is one of my earliest pickup designs and was basically born out of my personal desire to build a pickup that looked different from other pickups on the market. When I first set out to build a pickup, I was just starting to get into luthiery, and I was building my basses of my own design. When it came to spec’ing parts, I quickly became frustrated with the pickup choices out there. Most of them were either based on Fender designs or were featureless black soap bars. It just didn’t makes sense to me to spend the time to design and build a unique instrument and just drop a P-bass pickup into it. Instead, I found myself drawn to more unusual guitar pickups like lipstick tubes and gold foil pickups. I wanted a pickup that reflected my design sensibilities and had lots of chrome.
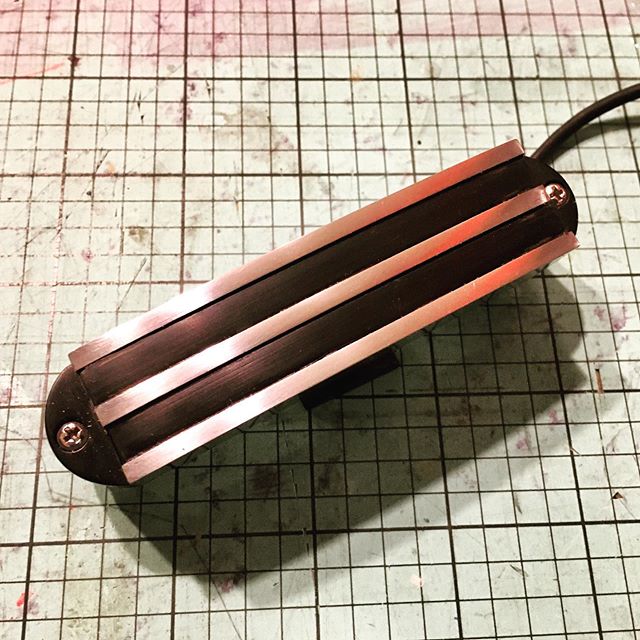

My primary goal being to design a pickup that was both functional and visually arresting, I was immediately drawn to the sidewinder concept. The look of a central metal blade completely bisecting the face of the pickup would lend itself to an unusual and iconic look. The outer blades, while serving as magnetic pole pieces, would also add a bit of extra pizazz to the look of the pickup.
In my initial attempts, I made the blades from chrome-plated pieces of 1018 steel bars. Unfortunately, the plating process turned out to be pretty expensive and I wasn’t sure how well the epoxy would stick to the plated parts over the long term.
After doing something research, I found that 430 stainless steel shared similar magnetic qualities to 1018 steel. However, being commonly used for appliances and countertops, the 430 stainless steel could only be found in sheet form. Luckily, I was able to have my pole pieces cut with a waterjet by a local fabricator. Do-Rite Fabrication is located in Ventura, CA, and pretty great at turning these parts around.
One thing I did find was that the 430 stainless steel doesn’t polish up very well; it is is fairly soft and is prone to scratching. Instead, I give my bass sidewinders a lightly brushed finish not unlike the finish found on major kitchen appliances. It looks great and is easy to repair.


While cardboard is not typically a material one would associate with custom bass pickups, there is actually a long tradition of making pickup bobbins out of paper products. Some of the earliest guitar pickups were made with paper bobbins. Using very thin cardboard for the bobbin flanges, I am able to fit as much wire as I possibly can in a small space. Most other materials, such as Forbon or Garolite are too thick or difficult to cut. I have my cardboard bobbin parts laser cut for consistency and ease of manufacture.

In the process of making the Bass Sidewinder, I designed and developed an Arduino-driven winder to wind narrow coils for the pickup.

Once the bobbins are encapsulated in epoxy resin, they become really solid. In fact, the cardboard is really absorbent and soaks up a lot of the epoxy during the encapsulation process.
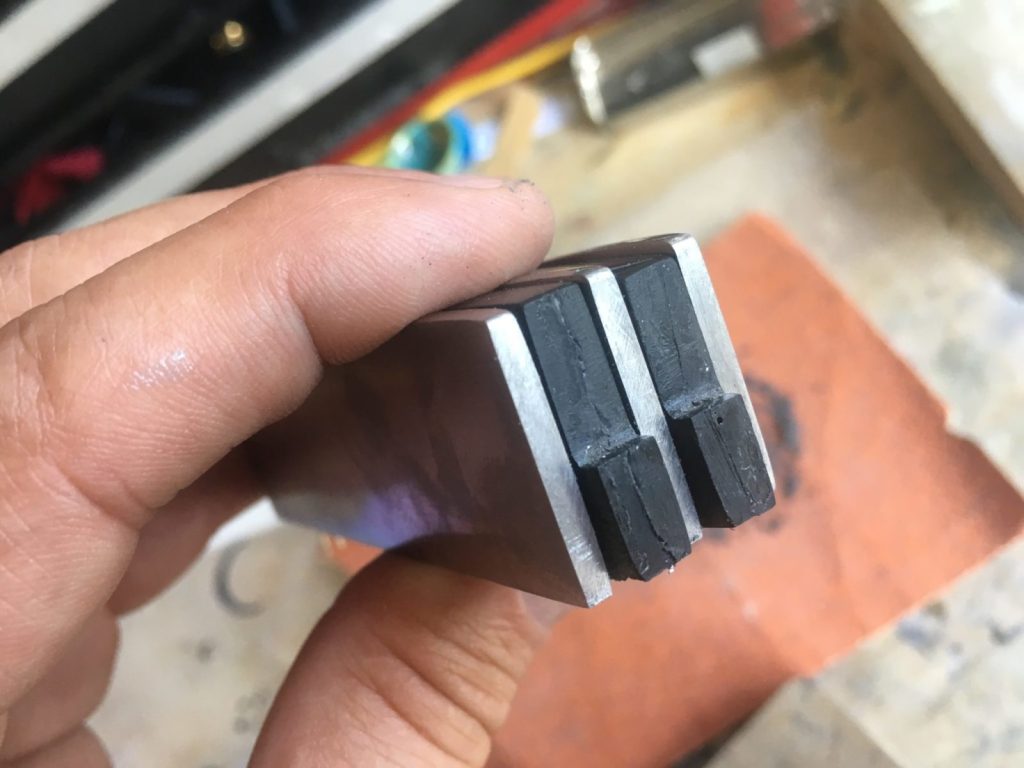
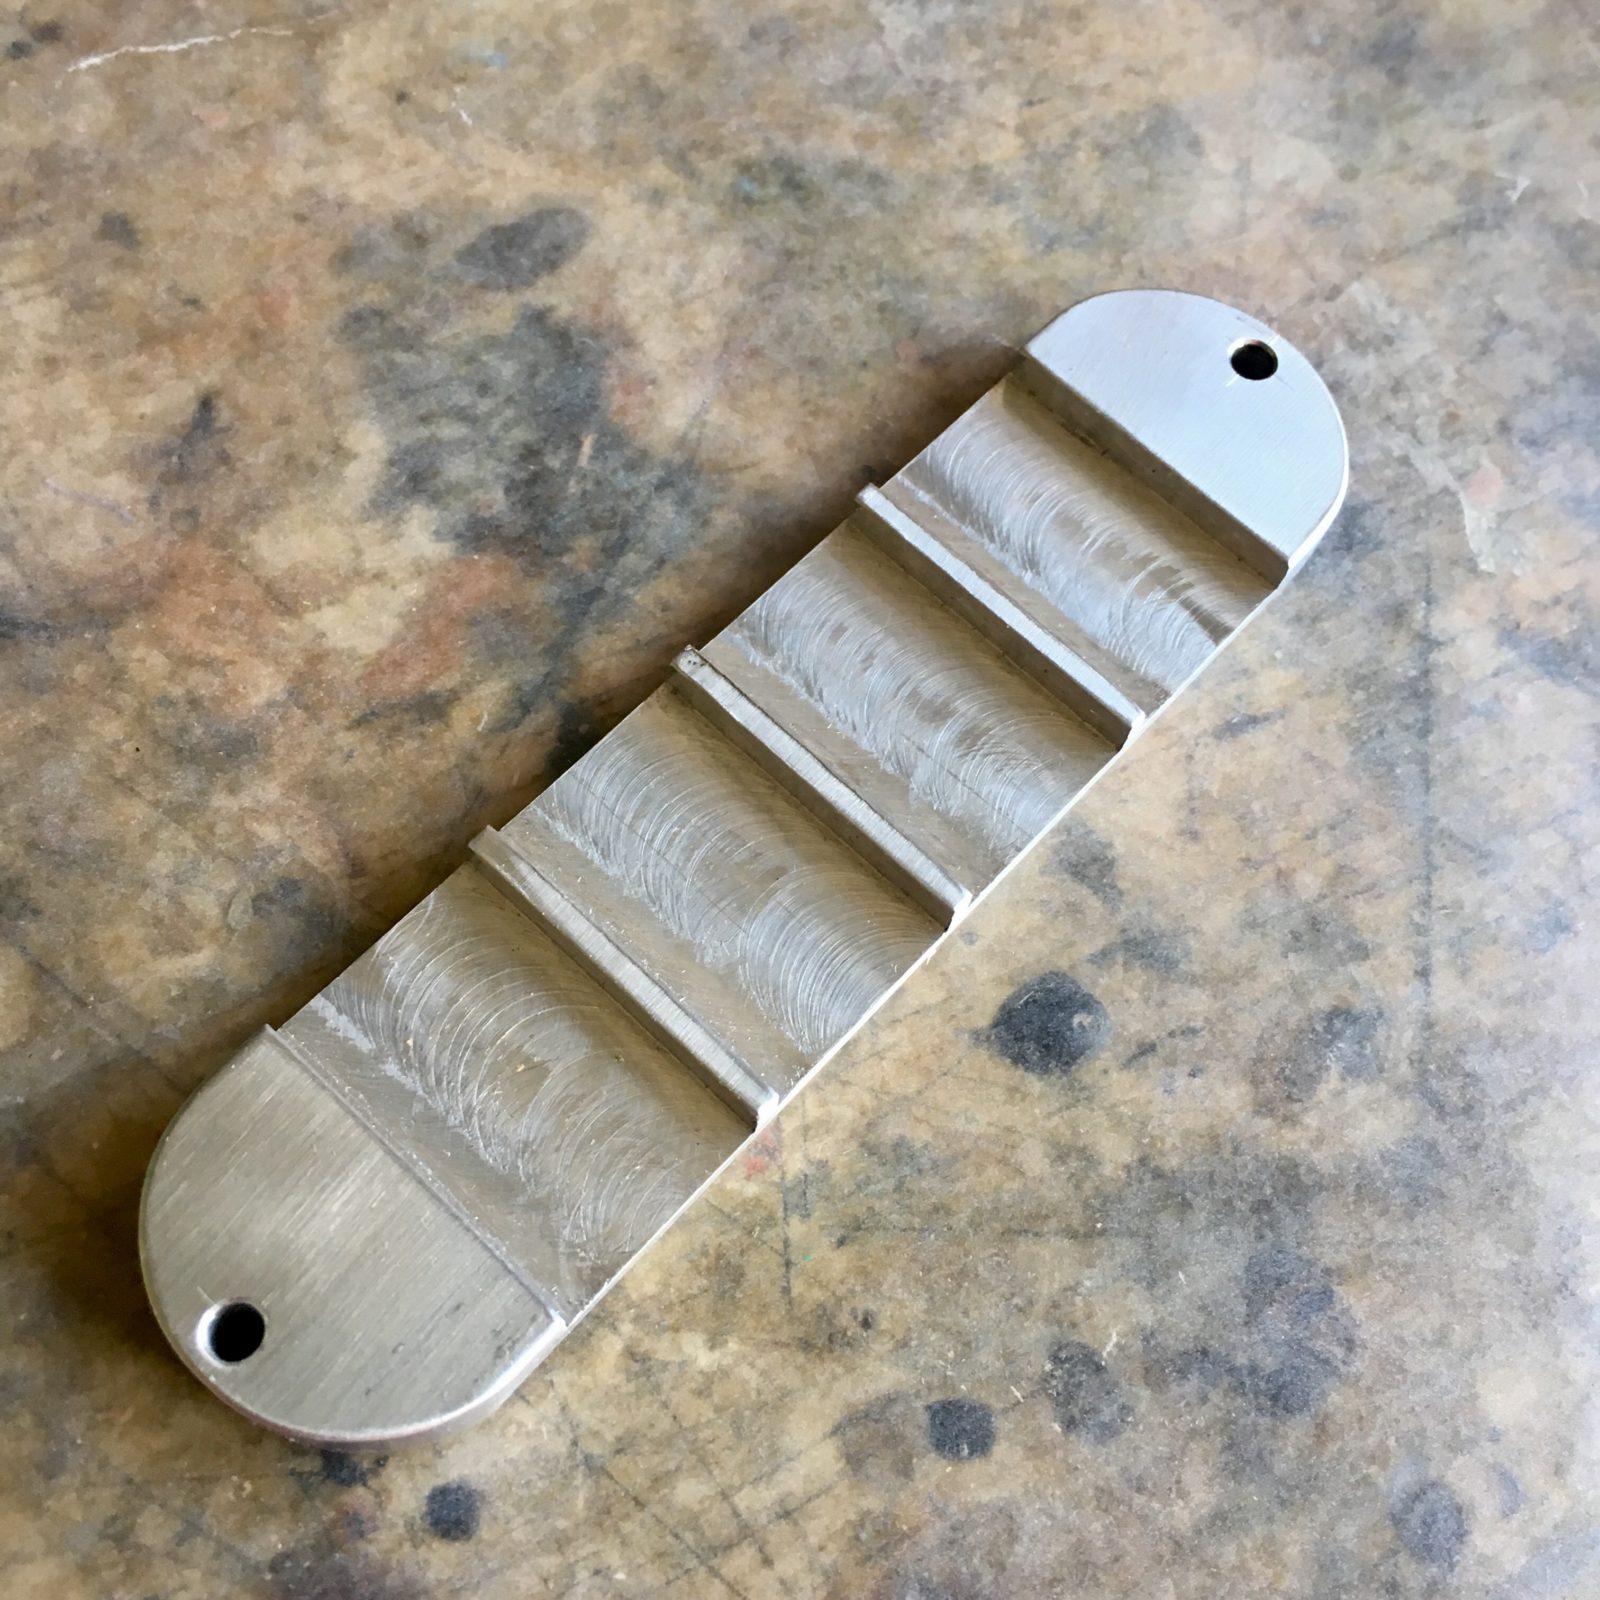
In order to emphasize the natural beauty of brushed metal, I decided to leave the outer blades exposed. To do so, I designed a unique layered construction. After encapsulating the bobbins in black epoxy resin, the bobbins are epoxied between layers of stainless steel.
The pickup ears are glued to two “nubs” on the outside of the pickup. This not only allows for a secure joint, but also helps to register the pieces and ensure that they are all perpendicular.

The Funktronic Bass Sidewinder has a bright, twangy sound and a neutral-sounding midrange. While not the bassiest pickup out there, it’s narrow and focused design gives it a natural hi-fi sound. In addition, when used in conjunction with the specifically voiced Funktronic Bass Preamp, it is capable of producing a big, deep and clear bottom end.
Originally designed to be placed in the bridge position, the Funktronic Bass Sidewider will also work in the middle and neck positions.
I’ve been gigging with my 7-piece R&B band using the Sirena Modelo Uno Bass since 2019. Featured as “Bass of the Week” on NoTreble.com, the Sirena Modelo Uno comes with the Funktronic Bass Sidewinder as option. You can take a look and give a listen to the pickup in action below.

Over the last couple months, I’ve been immersed in developing my neodymium multi-coil sidewinder pickup. The idea was to make a bridge pickup that can do it all, but take up a smaller space than a traditional pickup. I figured that the entire width of the pickup would be used a the sensing area as there are no coils wrapped around the poles. It seemed to do the job pretty well. The relatively large neodymium magnets reproduce a lot of bass, while the naturally extended highs of the sidewinder design work together. I voiced a little onboard preamp to bring it up in a live band situation.

The first two big problems to solve were the small amount space for the multi-coil assembly and keeping the magnets from crashing into each other. The neodymium magnets are really strong and somewhat difficult to manage. So, I designed a little base and had Bruce over at X-Strange machine a master that I could use for prototyping. The base has little trays built in that I could use to place the magnet assembly. I had to use a combination of press-fitting and glue. From there, I came up with a design for my bobbins. The trick was to be able to fit the terminals within the walls of the bobbin itself.

The bobbins are a combination of cast polyurethane and paper. I file grooves for the wires and attach them with CA glue. I figured that once they get encapsulated inside a block of epoxy, the paper and CA clue will be strong enough. They are pretty fragile, however t I only had one actually fail during the prototyping process – and that was purely due to operator negligence.
I wound these on The Funktronic Coil Genie.

I encapsulated the pickup in white polyurethane, but I wasn’t happy with the results. So, I bound and capped it with some nickel silver scraps I had laying around. Using various cements to affix the metal, I had better luck with the softer adhesives like E6000 or Gorilla Glue. For some reason, CA or epoxy wouldn’t hold the metal down. I’ve never had that problem – usually epoxy will do it.
After gluing, I soldered the cap to the binding with my soldering iron. In another life, I used to solder little structures like this all day long. Back then, I used a propane or oxy-acetylene torch. This was the first time I’ve done it with a soldering iron. It wasn’t too bad! The nickel-silver is really forgiving; I had a sand-through that I patched with a blob of solder (it’s really thin metal). Once you sand it, the patch is barely perceptible. At the very least, my cap and binding job will provide some shielding.
Despite the seemingly complex multi-coil assembly, the build process itself was pretty straightforward. It’s really a long series of many simple steps. Here’s a few images of the assembly process.


So far, my preliminary have been promising. It sounds really good! I’m really anxious to get it installed in a bass so I can test it out in the field.

Gearing up this week to build a “completed” prototype of my multi-coil sidewinder bass pickup. #funktronicpickups #basspickups #handwoundpickups #guitarpickups #boutiquebass #boutiqueguitars
Instagram filter used: Normal

Works in progress. #funktronicpickups #basspickups #boutiquepickups #boutiqueguitars #custombass #handwoundpickups
Instagram filter used: Clarendon

A Modern Bass Inspired by the Kay 162 / Harmony H22 I’ve always had a longing for those old Kay and Harmony hollowbodies, but they’re getting harder to find, they’re usually way out of my price range, and they feel like they’re barely holding together. I set out to design a bass similar in size […]
